This post may contain affiliate links. Mommies with Cents receives free products for review purposes and may sometimes be compensated for posts but all opinions expressed are 100% my own. See Mommies With Cents disclosure policy for more details.
Panasonic wanted to make my winter more manageable so they sent me a few of their favorite items as part of a “Snow Storm Work From Home Survival Kit.” I have to say, I was most stoked about the Bread Maker. I’ve always wanted to try a bread maker but I wasn’t really sure what they were all about. I’ve made some homemade doughs and breads in the past but they were always quick breads or super simple recipes that didn’t need waiting for dough to rise or anything like that.
I’ll admit, I was a little intimidated at first. To be brutally honest, after leafing through the manual I thought I might be in a little over my head. I had no idea that there was such a thing as “bread flour” and the precise ingredient measurements listed had me a little worried. The book actually suggests that weighing your ingredients might be a better way to go. I don’t have a food scale and am admittedly a little sloppy when it comes to recipes. I really wanted my bread to come out good though so I really took my time and tried to be as accurate as possible with my first loaf.
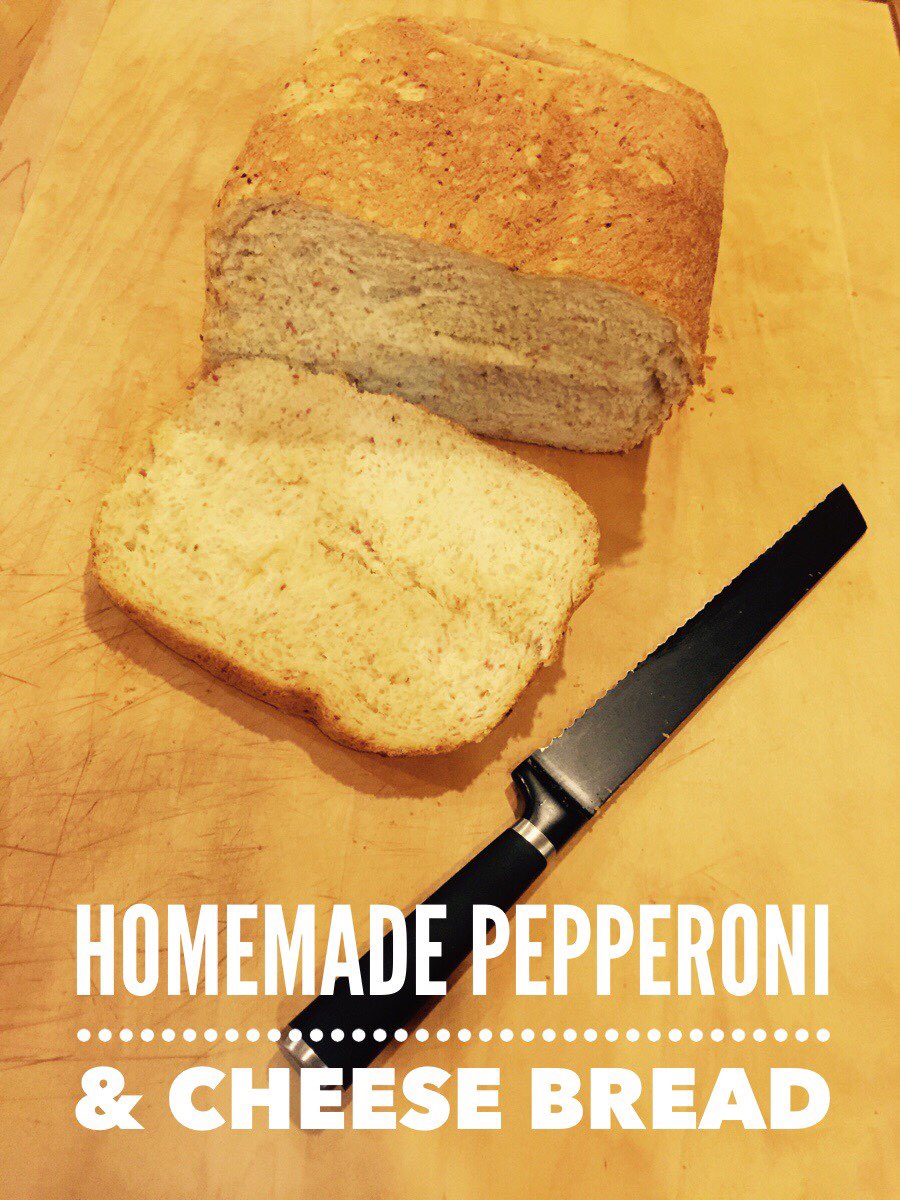
The measuring thing didn’t turn out to be as difficult as I expected because the bread maker comes with a measuring cup with detailed measuring lines on it unlike any of my standard measuring cups or pitchers. I went with the large loaf because the measuring looked easier to me but you can pick Medium or XL as well. Here’s the recipe I used for Homemade Pepperoni & Cheese Bread:
3 11/16 C bread flour (18 1/4 oz)
2 tsp salt
2 Tbsp dry milk
1 3/4 tsp sugar
3 oz finely chopped pepperoni
1/4 Cup chopped provolone cheese (I just used grated cheddar)
1/8 Cup grated parmesan cheese
1/2 tsp garlic powder
1/2 tsp onion powder
1/4 tsp orgenano
2 tsp olive oil
1 7/16 cup water (11 1/2 oz)
1 1/4 tsp dry yeast
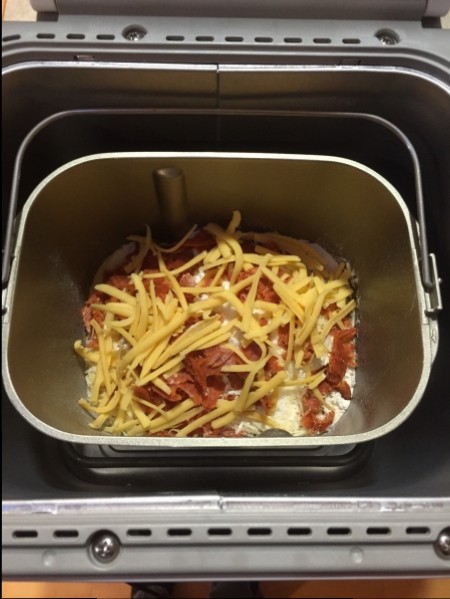
The directions said to put all the dry ingredients except the yeast into the bread pan then add the liquids. The yeast goes into a dispenser on the top of the unit and is automatically dispensed to the recipe when it’s time. Using the programmable menu I just selected my bread size, type and crust color I prefer and hit start. The timer registered at 4 hours. Good things come to those who wait but if you want bread with dinner, you better plan ahead! This, I did not. We did however enjoy a late night snack of delicious, fresh and warm bread straight out of the bread maker! I couldn’t believe how easy it was. The bread cooked perfectly and slid right out of the pan thanks to it’s non-stick feature. I’m hooked! The loaf didn’t last the day and I’m already trying to decide what I’m going to make tomorrow.
The Panasonic SD-YD250 Bread Maker has over 1800 positive reviews on Amazon and has a 4.4 star rating according to reviews on the Panasonic website as well. Based on my first use, I have no reason not to give the machine itself 5 stars. The book that comes with it that includes directions and recipes is somewhat confusing to me but this is likely due to the fact that I’ve never used any type of bread maker before. I did have to read through things a few times and wish the measurements were standard (perhaps they are standard for bread making?) but other than that, I am thrilled with this product. This is definitely a winter must-have!
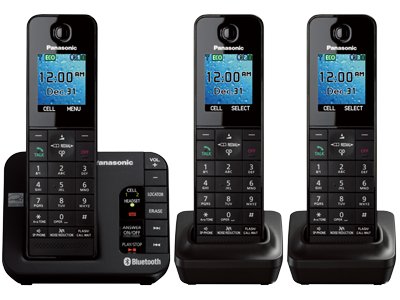
Next up is the Panasonic Link2Cell Phone. I haven’t had a landline for 7 years so this product isn’t for me but is great for those that have both a landline and a cell phone. The Link2Cell phone lets you sync your mobile phone with cordless handsets so you don’t have to carry your cell phone around the house or worry about poor cell signals. It connects via bluetooth. You can find out more about this product on the Panasonic website. It retails for around $88.

Last but not least is the Panasonic Mobile Charger. With all the gadgets my family owns, having a portable charger is essential! And if the power goes out we are going to be so thankful with have this small but mighty gadget that can charge two devices at the same time. When fully charged it provides up to 5 hours of charging time (or 2.5 hours per port). The Panasonic Portable Charger is Qi enabled which means you can charge the battery pack wirelessly with any Qi charging surface. An LED indictor keeps you informed on the remaining battery life so you always know when you need more juice. The Portable Charger retails for around $50 and ships for free from the Panasonic website.
A complimentary product/service was provided for this review, however, all opinions expressed are my own. I was not compensated in any other way. See Mommies With Cents disclosure policy for more details.
Feeling lucky? Enter to win a Panesonic Mobile Charger by filling out the form below. Also, be sure to check out all of our other giveaways. NOTE: If you don’t leave your address, I won’t have a way to get your prize to you. If you need more guidance filling out this form, you can watch this video on how to enter Rafflecopter giveaways.
This giveaway is open until January 20, 2015 at 12:01 am EST to U.S residents.
Your information is confidential and used for contacting the winner and prize fulfillment purposes only.
My favorite recipe that is easy for kids is the lazy cake cookies. All you need is a box of white cake mix, 2 cups chocolate chips, 5tbs of melted butter and two eggs. Yum very easy for the kids. I got the recipe off of Pinterest
http://www.pinterest.com/pin/196539971214283790/
My favorite recipe for kids is ants on a log.
Mac and Cheese.
pizza bagels
cinnamon sugar toast
Nestle’s Quick Brownies…super easy and really good.
We love to make rice crispie treats. Have to put butter on the palms of our hands so won’t stick so much.
Peanut Butter and Jelly sandwich with small children. Older ones could easily make grilled cheese sandwiches, spaghetti, cookies, brownies,etc…